Bead Board Ceiling How-To
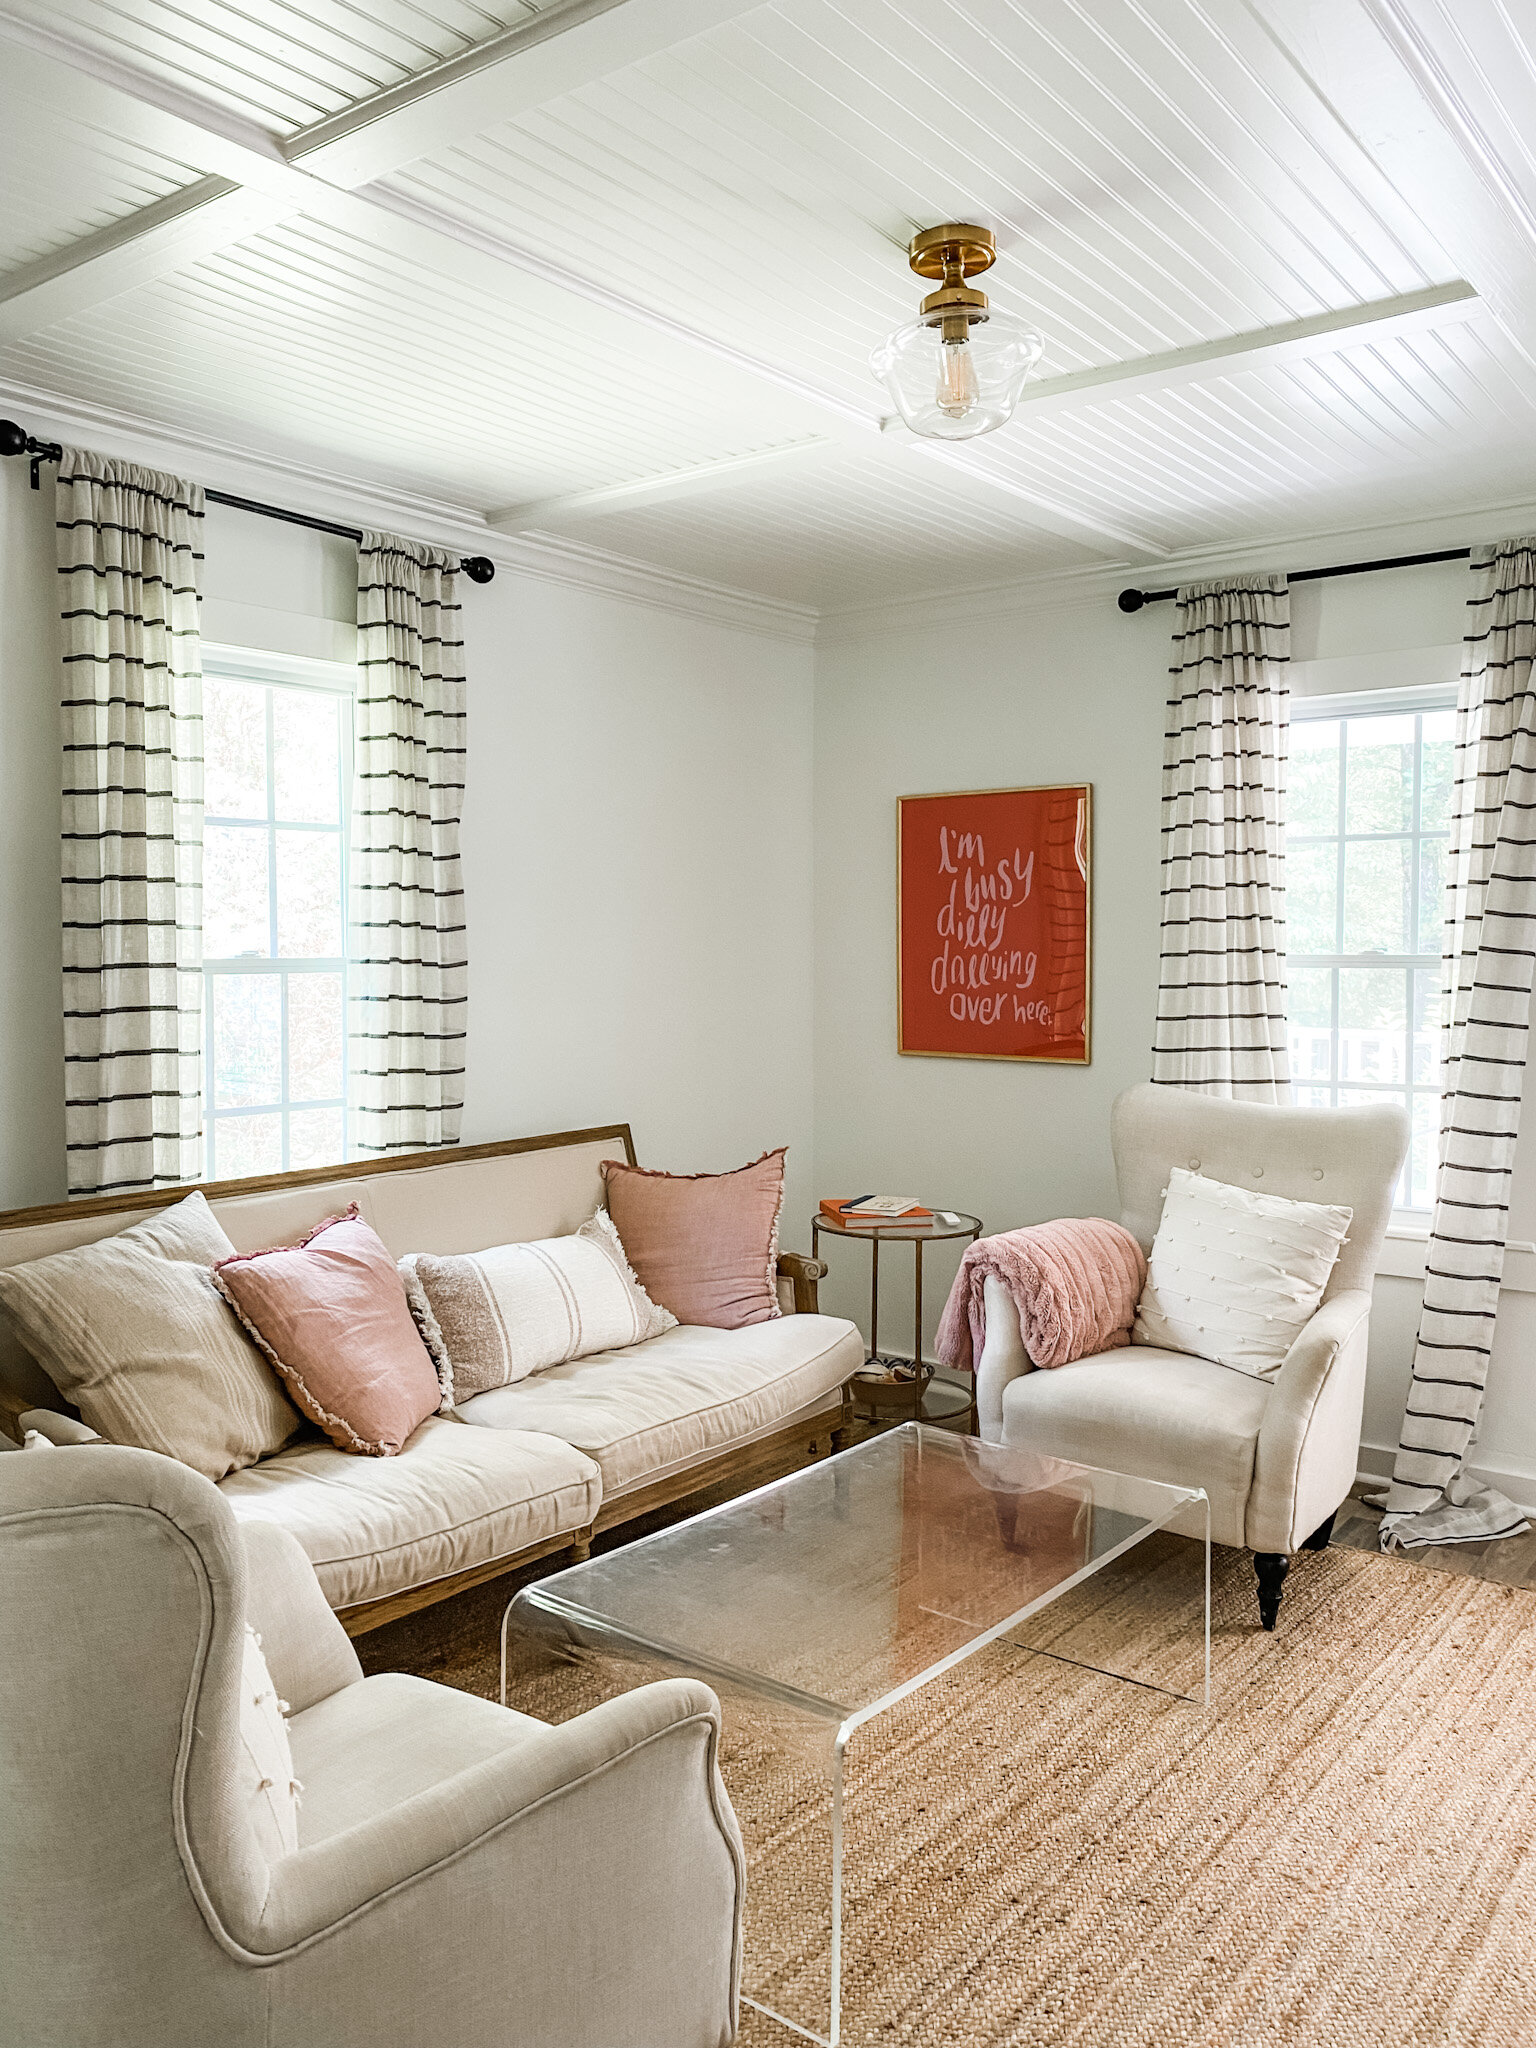
the living room
The long awaited tutorial!! We are not DIY bloggers so I did not take step by step photos but you guys have asked for the how-to and we are here to deliver! Sam Graham is a miracle worker. We were not originally going to move into the cottage and once we decided to, we had about a week to get the house ready for painters so we could move in after selling our home. Holy smokes you guys. This house was a rainbow of colors and had popcorn ceiling. We knew the removal would be super messy so we opted to cover the ceiling instead. I love the way it turned out. Sam will share some videos that were helpful to him as well as what you will need to pull this off! Tag us if you create something similar in your home.
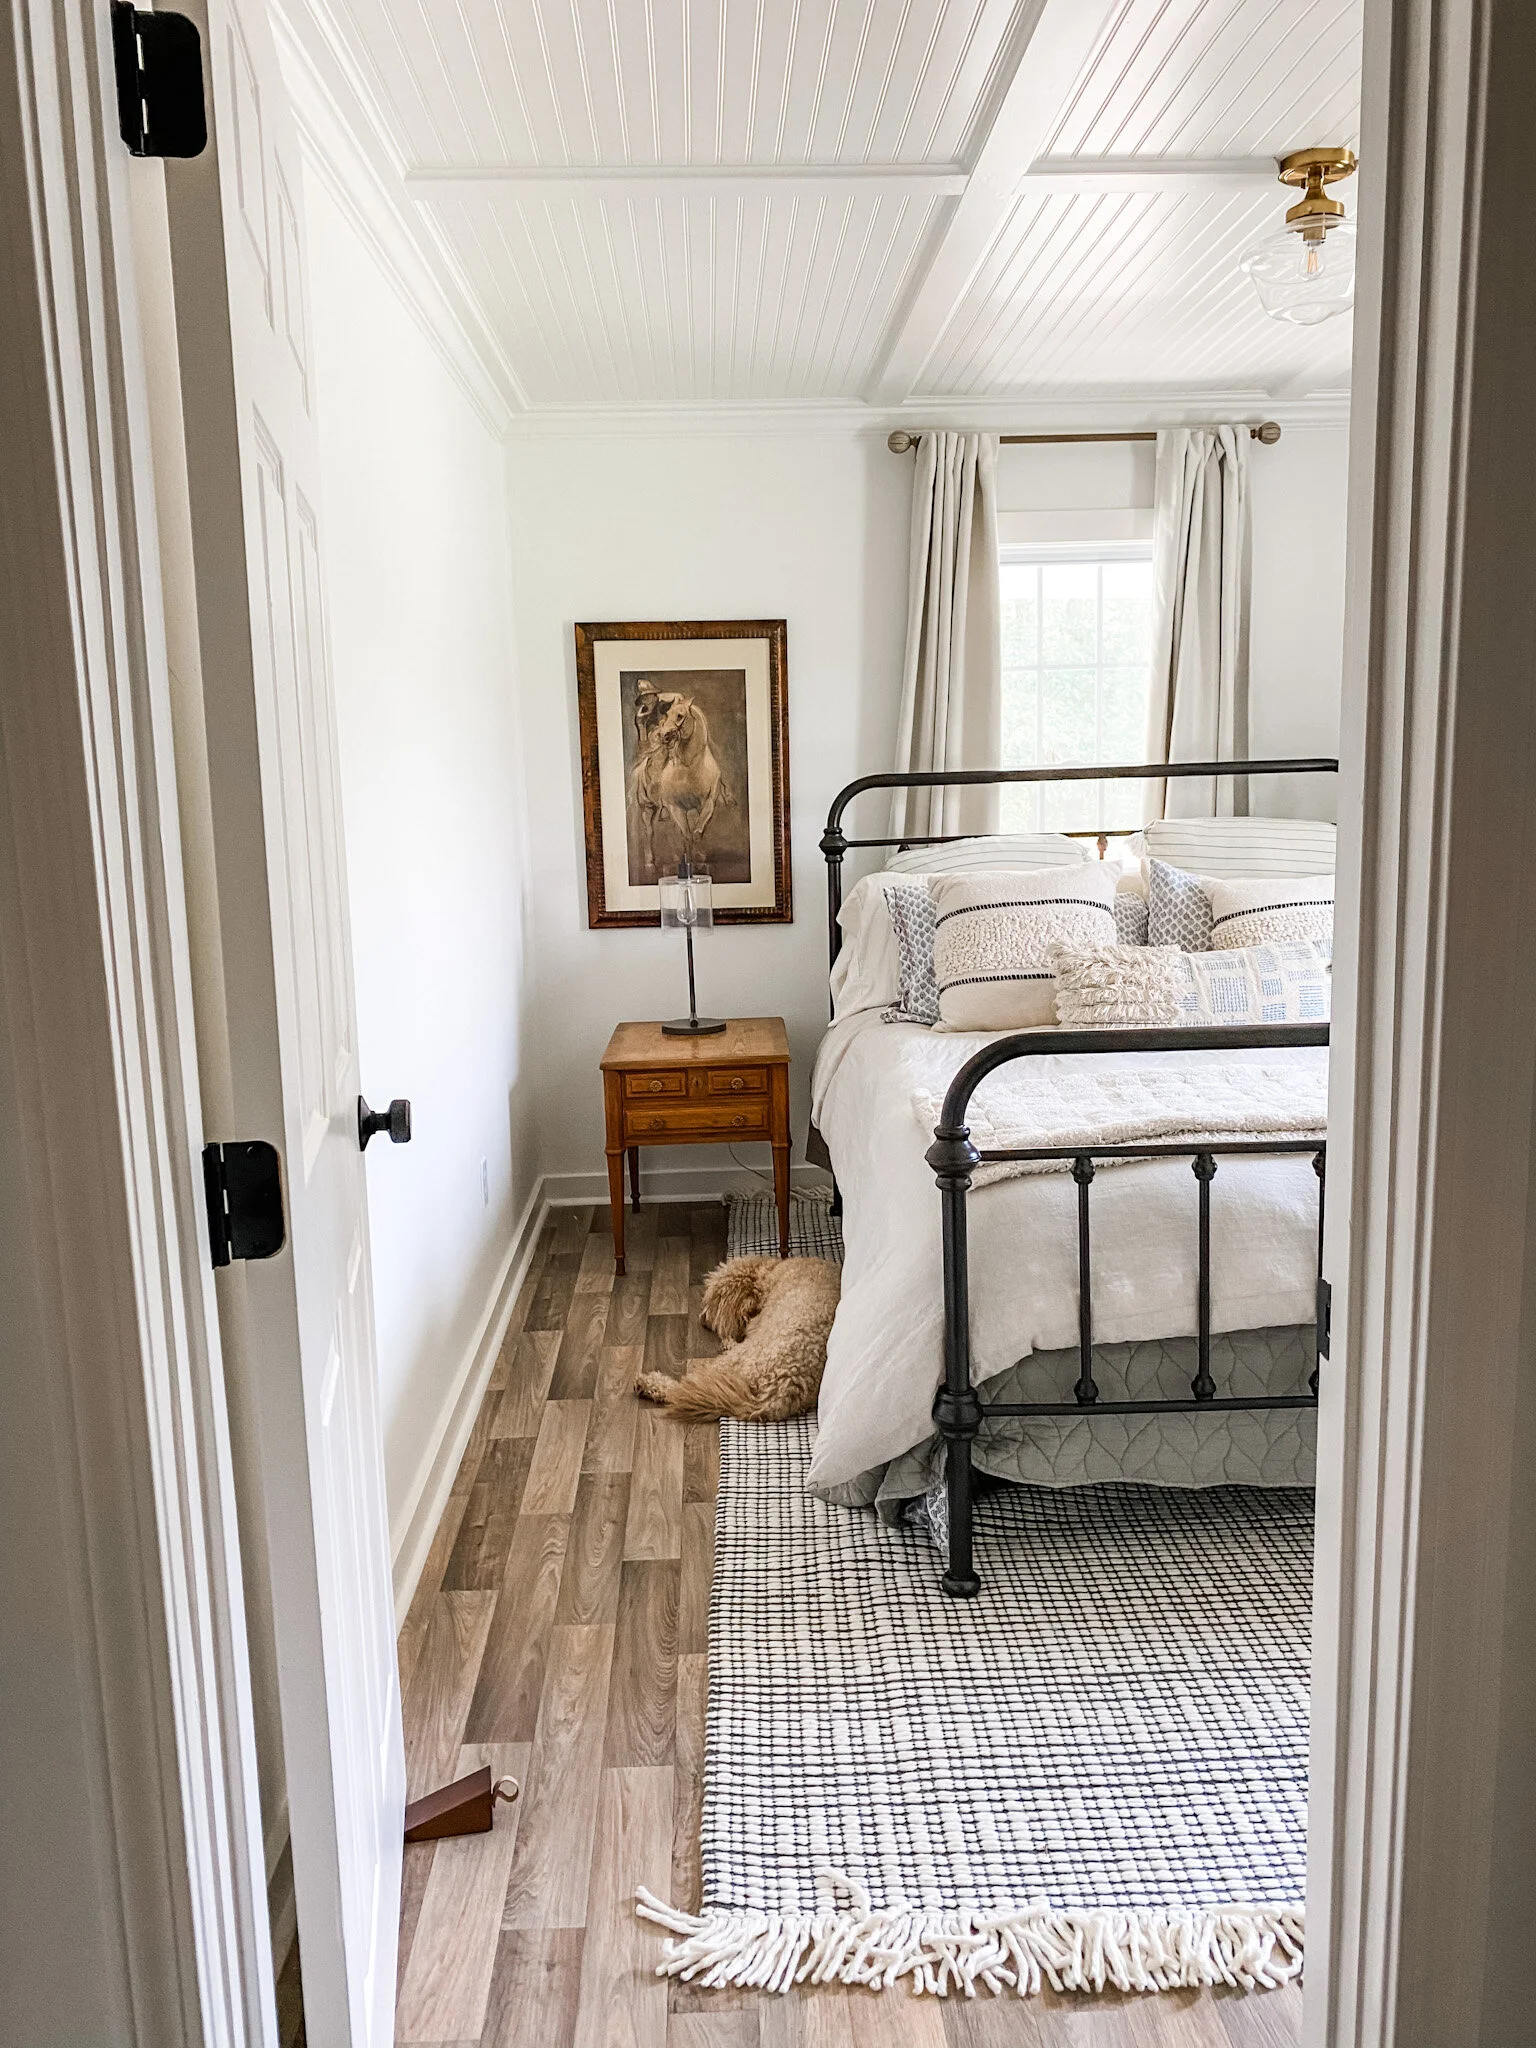
our room - details here
First thing's first - you CAN do this! It may seem a bit complicated at first, but you'll find your rhythm and it'll come together!
After you've psyched yourself up, you've got some prep work to do.
Tools you'll need:
Chalk box (2 colors if you're covering flat ceilings)
Tool belt - if you don't own one already, here's your excuse!
Painter's Tool (for removing trim)
HOW-TO:
Step one: Before you get started, you'll need to pull down any existing crown molding or trimwork. If you plan on reusing the crown, be super careful pulling it off the wall / ceiling. Also, don't forget to kill your breaker and remove any light fixtures in the room. Safety first, or at least early.
For flat ceilings: If you're putting up the beadboard panels on a flat ceiling, I would grab your stud finder and locate your joists on opposite ends of your ceiling. Snap a chalkline to indicate where your joists are, and ideally you'd have a separate chalk color you can use for laying out your beadboard pattern.
For textured ceilings: If you're covering popcorn ceiling your studfinder isn't going to be much help locating your ceiling joists. If you have access to your attic, and it's not a complete wasteland, you might be able to get a long / thin drill bit through either side of the joists in your attic to indicate on the ceiling where your joists are. If you can do this, mark your joists with a different colored chalk line than you plan to use for marking your beadboard layout.
*If you don't have a way of marking your ceiling joists, it's ok...I didn't either. You'll just use a ton more nails.
Step two: Let's layout our beadboard pattern! If you have overhead lighting in your room, you need to decide where you want your panel seams to be in relation to the light. I think it looks better for the light to be in the center (or as much as possible) of a beadboard panel, but if your room is small or narrow, you may need to have the light on a seam.
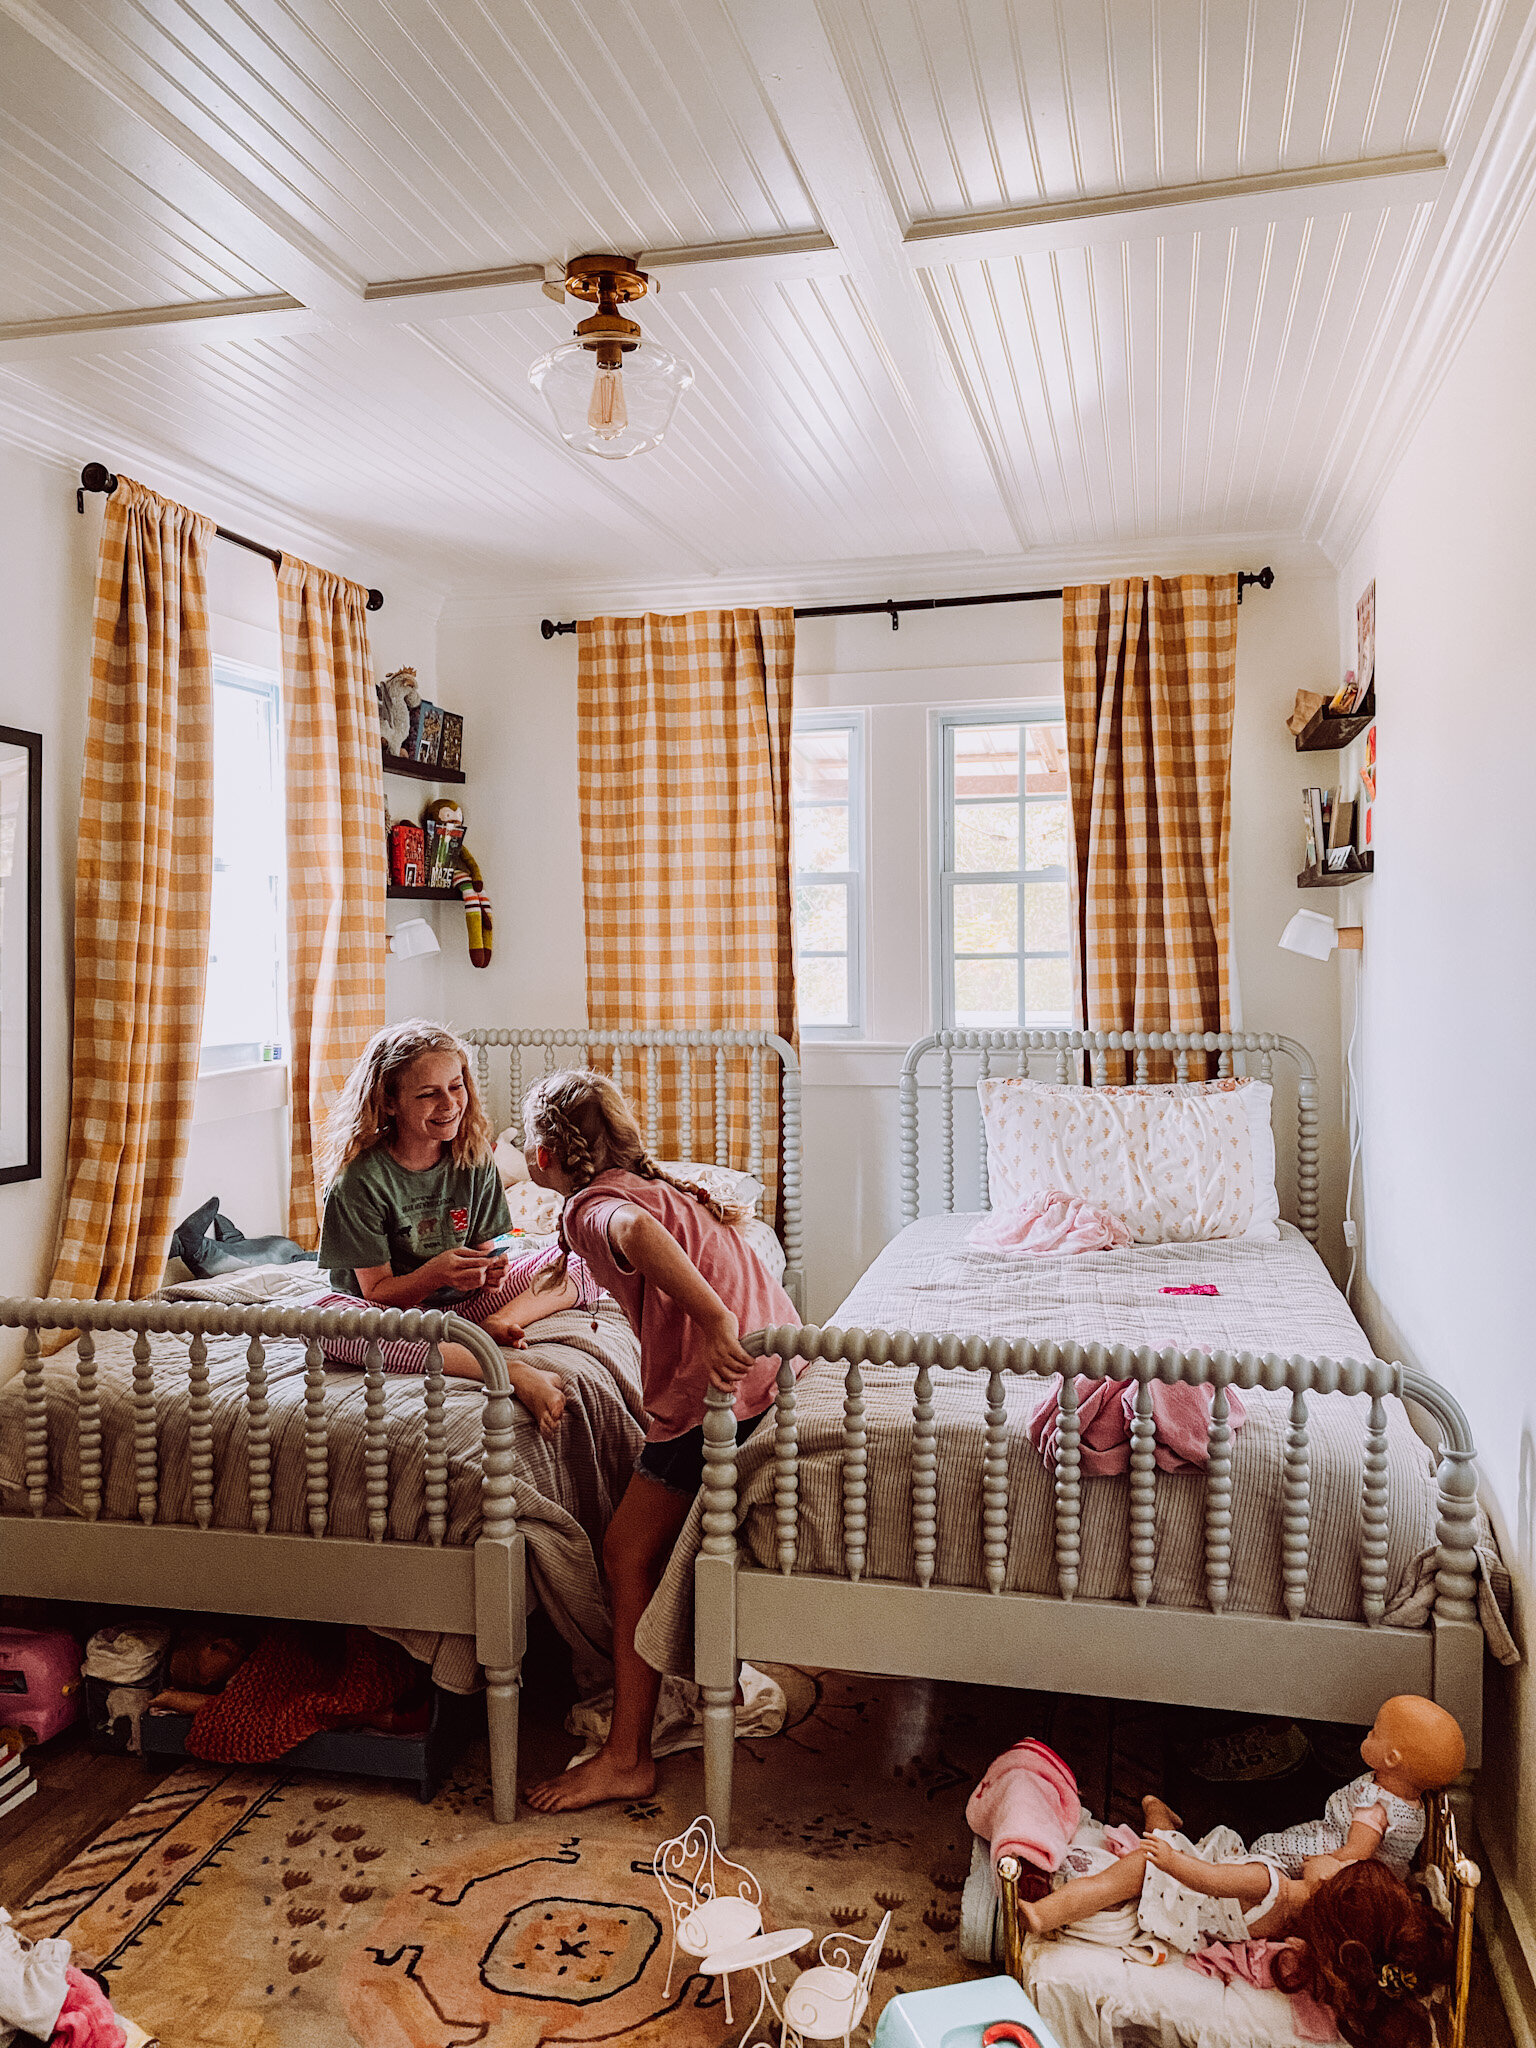
Our living room and dining rooms are about 150sq ft so I opted for a 9 panel layout. The girls' bedroom is really narrow so I opted for a 6 panel layout in their room.
As I'm typing this out, it sounds crazy complicated, but truly, it's really simple to do in person! I've drawn a couple diagrams to help with my lack of explanation skills! I would HIGHLY recommend you sketch out your room and draw your layout before getting started.
For a 9 panel grid:
Measure the length of WALL C in inches. Divide that number by 3 and write it down.
Measuring from WALL A, mark POINT 1 (closest to WALL C) and POINT 2 (closest to WALL D). The distance from WALL A to POINT 1 and POINT 2 is the length of WALL C divided by 3.
From WALL B, mark POINT 3 (closest to WALL C) and POINT 4 (closest to WALL D). Again, you're using the measurement of WALL C divided by 3.
Snap a chalkline connecting POINT 1 and POINT 2. Snap another line connecting POINT 3 and POINT 4.
At this point, you should have 2 chalk lines on your ceiling, and they should be the same distant from each other as they are from WALL A and WALL B. Check yourself before you wreck yourself!
Follow the same steps to mark your grid lines perpendicular to the ones we've just marked.
Measure the length of WALL A in inches. Divide that number by 3 and write it down.
Measuring from WALL C, mark POINT 5 (closest to WALL A) and POINT 6 (closest to WALL B). The distance from WALL C to POINT 5 is the length of WALL A divided by 3.
From Wall D, mark POINT 7 (closest to WALL A) and POINT 8 (closest to WALL B). Again, you're using the measurement of WALL A divided by 3
Snap your chalkline connecting POINTS 5 and 6. Snap another line connecting POINT 7 and POINT 8.
At this point you should have a grid on your ceiling that looks somewhat similar to figure 2. Double check that all your lines are correct and let's move on.
Last piece of prep-work, you need at least 1 deadman, preferably 2. A deadman brace is a couple pieces of scrap lumber assembled in the shape of a T to help you hold up your bead board panels. Even if you have a helper with you, the deadman is indispensable.
I used 2x6 common boards for this, but you could probably be just fine using 2x4s. Just don't use pressure treated boards; they're too heavy! For your long piece, measure the distance from the floor to the ceiling and subtract 1.5". Get another board and cut it to 36". Screw the center of the small board to the top of the long board, making a T.
Let's do some actual work!
The gridlines you snapped out are the borders for your bead board panels. They also will indicate where your 1x4 boards will be used to cover the seams. If you've sketched on paper your ceiling layout, you should know the dimensions of each of your panels. If you didn't sketch out your ceiling, measure the dimensions of the squares on your ceiling and let's get cutting!
Take your bead board, measure your cutlines, and mark on the backside of the panel. I used a drywall square to draw my cutlines nice and straight. Verify your measurement and make your first cut.
PRO TIP (meaning- lessons I learned by doing it wrong the first time!): Start your panels in a corner of the room. When you make your first cut, make sure that the uncut edges (square edges) of the bead board panel will contact the 2 walls in the corner of your ceiling. This will give you a greater chance of having the lines on the bead board parallel with your walls.
My method for hanging the bead board panels:
Prop one deadman against the wall so that the top of it is about 2-3 inches below the section of ceiling where you're about to hang the bead board. Put your second deadman nearby so you can use it to prop up both ends of the bead board before you nail it in. Get on your ladder and insert one edge of the bead board on top of your deadman.
Adjust the panel so that it is square with your wall and pull the first deadman towards you so that it holds the panel snugly against the ceiling. Make any needed adjustments to the panel and then pull your second deadman in place so the entire panel is supported by your deadman braces. If everything is nice and square, press the panel nice and tight agains the ceiling and nail it up using your finish nailer. If you had the luxury of marking your ceiling joists, I'd nail those first, and then put "supporting" nails between the joists to reduce the chance of sagging. If you don't know where your joists are I shot one nail into every other "lane" on the panel all down the panel. I'm not kidding when I tell you I used 5,000 nails on a 900 sq ft house.
A note on glue - When I started, I was using glue on the back of each panel. If you are covering popcorn ceilings, I found that there really isn't a point in gluing the panels since the texture on the ceiling will prevent the majority of the panel from contacting the ceiling. If you are installing the panels on a flat ceiling, I would go ahead and add glue for added security.
Subsequent panels:
The next panel should be the one that continues the lines down the ceiling of the panel you just installed. I do this just to make sure my lines are nice and straight if you're looking at a straight line down the room. Cut your next panel to the dimensions based on the grid you created on your ceiling. Don't worry if the panel is a little small. You'll cover this with your 1x4s. Just make sure it doesn't go over your chalk lines and make certain that the lines on the panel match your first panel and are as straight as possible. Install it in the same way as described above.
Center panel of the room:
You'll almost certainly need help to install the center panel of the room since there isn't a good place to prop up your deadman braces. Also, if you have overhead lighting, you'll need to cut out a circle that fits your light fixture. Luckily since you have chalk marks on your ceiling, you'll know exactly where your light needs to be. Measure on the ceiling to the center of the light box and determine the circumference of your fixture. Using a pencil and string, scribe a circle on the good side of your bead board panel. Drill a 1/4" hole on the inside edge of your scribed circle, then finish cutting out the circle with your jigsaw. Ensure the panel fits properly with your light box, and install as before, except now you have a friend helping you!
Installing 1x4 trim boards:
I'll first install 1x4s around the footprint of the ceiling (do ceilings have footprints?). Installing these is a bit easier with help from a friend, but if you have no friends (lol!) your deadman will suffice. Start with WALL A and WALL B. Cut your 1x4s about 1/8" - 1/4" LONGER than the length of the wall. Start with the ends of the board and have those contacting the walls such that the center bows down towards the floor. Force the center of the board up so that the board is wedged very snugly between the wall and the ceiling. Use your framing nailer to fasten the board to the ceiling. Also, not a bad idea if you wanted to use a bit of glue on these.
Repeat the process for the boards that run lengthwise down the ceiling.
For the boards that run perpendicular to the boards you just installed, measure the distance between boards at your bead board seam lines. Cut these as close as possible to the exact space you need. You can't cut these overside 'cause they're too small to force in place, but you still want a really snug fit. Make sure everything is nice and square and nail 'em up.
At this point, you've got all your bead board up, and your 1x4 trim boards are up and covering your panel seam lines. This looks pretty darn good right!? This next part is optional, but we opted to install cove mold on the inside each of the square panels on our ceiling. This not only helps to hide the joint of the 1x4 over the bead board panel, but it adds a really nice elegant touch to the overall look and feel!
Measure the inside dimensions of each of your squares. Cut your cove mold at a 45 degree angle such that either end is slanted "backwards" and the "tips" of the mold are the exact measurement you need. Ensure each piece is a snug fit and nail this up with your brad nailer.
PRO TIP - measure and cut all 4 pieces at once (and mark what piece goes where on your 1x4) so you minimize the commute time between your project and your mitre saw!
Now you've got your bead board panels, 1x4 trim boards, and cove mold installed! You're so freaking handy! Now let's hand crown molding.
For this section, I'm not even going to attempt to explain crown molding. There are several different methods of cutting crown, and I'm equally terrible at each! Let's just say our crown molding is installed with equal parts cuss words and caulk! I will say though, that I bought these crown molding hanging things off of Amazon, and they are literally a game changer!
This guy has a really good channel. Tons of info on trim carpentry.
This guy's channel is super fun! Lots of good info too, and his montage videos of him working are so fun!
Last step prior to paint: Caulk! Now you get to fill in those 5,000+ nail holes with caulk. Enjoy.
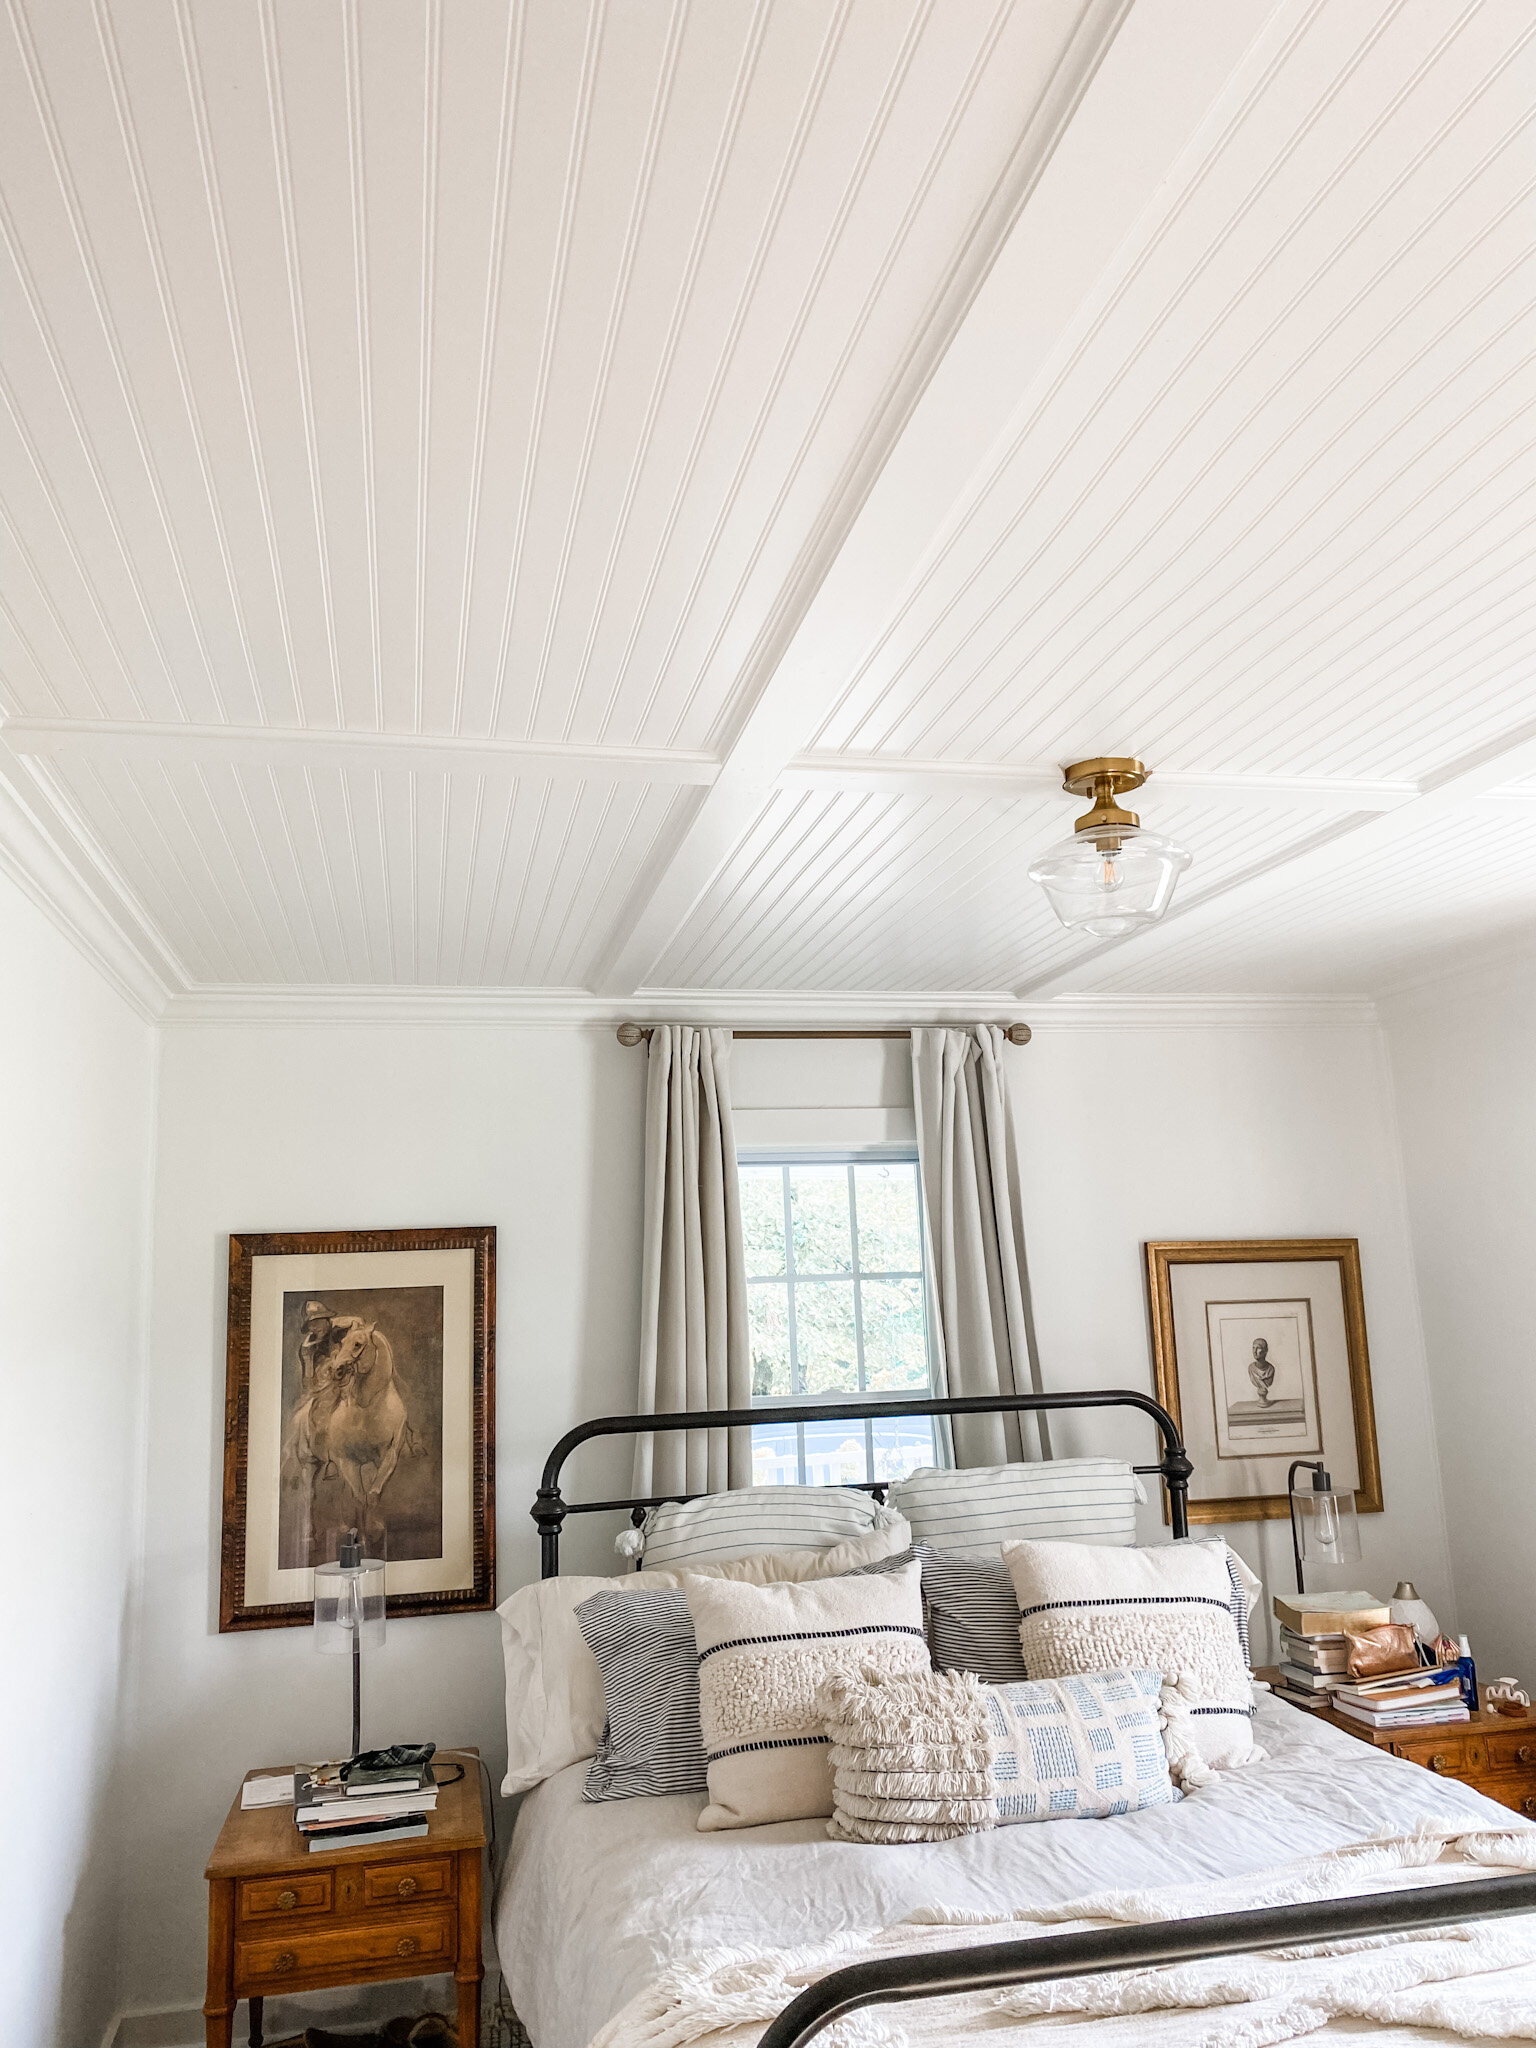
room details here

Sources for these rooms can be found here!